How to Make a Training Video: An 8-Step Guide
How to make a training video from an SOP or policy with no video team: set one goal, script it, pick a format, review, publish, update. Sample outline inside.
To make a training video, start with one procedure and one thing the viewer should be able to do afterwards. Turn the written steps into a short spoken script, pick the simplest format that shows those steps clearly, and have the person who owns the procedure check it before anyone watches. Then publish it where your staff already look, and update it whenever the procedure changes.
That is the whole method, and you do not need a video team for it. Most good training videos for employees are short, plain and built from material you already have. Below, each step in order, then a worked example from a front desk procedure with an outline you can copy.
Step 1: Write down the learning goal in one sentence
Before you open any tool, finish this sentence: "After watching, a new team member can..."
Good goals are actions you could watch someone do:
- "...log a customer complaint in the system and give the customer a reference number."
- "...pick an order from a pick list and confirm each item with the scanner."
- "...report a near miss on the warehouse floor to the shift lead."
Weak goals sound like "understand our complaints policy". You cannot watch understanding, so you cannot tell whether the video worked. Ask what the person would do differently instead.
Step 2: One procedure per video
This is the rule people break most often. A 20-minute video covering the whole customer service manual gets watched once, under protest. Four short videos, one per procedure, get watched when someone actually needs them.
A useful test: if two headings in the SOP could be done on different days by different people, they are two videos. "Handling a complaint" and "issuing a refund" feel related, but the front desk does the first and a supervisor approves the second. Split them. Short videos are also easier to keep current.
Step 3: Turn the SOP into a script or outline
Written procedures are not written to be heard. Read one aloud, with its numbered clauses and "see section 4.2", and it sounds like a contract. Rewrite it the way you would explain it to a new starter standing next to you.
A simple shape that works for almost every procedure:
- Why it matters (one or two sentences, a real situation the viewer will recognise)
- The steps, in order, each with the action and the reason
- The common mistake, and what to do instead
- A one-line recap the viewer can remember
Keep sentences short. Use "you". Say names and screen labels exactly as the viewer will see them at work. Anything they do not need to do the task can stay in the written policy.
Speech runs at roughly 130 to 150 words a minute, so a two-minute video is about 250 to 300 words of script. That is less than most people expect. For more detail on this step, our guide to turning an SOP into a training video goes clause by clause.
Step 4: Choose the format and length
There are four common ways of making training videos. None is best for everything.
| Format | Best for | Watch out for |
|---|---|---|
| Screen recording (with voiceover) | Software steps: "how to log a ticket in our CRM" | Goes out of date when the screen changes; dull for anything off-screen |
| Filming a person (phone or camera) | Physical tasks: lifting, using equipment, greeting a guest | Needs decent light and sound, a willing presenter, and a reshoot when the procedure changes |
| Slides with voiceover | Policies with a few key points | Easy to make, but easy to fill with text people read instead of listening |
| Animation or whiteboard (including AI tools) | Processes, decisions, "why we do it this way", soft skills | Not ideal for showing exact hand movements or a real machine |
A rough guide: if the viewer must copy a precise physical movement, film it. If they must click through a screen, record the screen. If they must follow a sequence, make a judgement or understand a reason, a drawn explainer often works better, because each idea can appear on its own while it is being spoken about.
Aim for two to three minutes for a single procedure. Choose the frame by where people will watch: wide for a laptop or the LMS, vertical for phones on the shop floor.
Step 5: Record or generate the video
If you are recording yourself:
- Record in a quiet room with the microphone close. Bad sound loses viewers faster than plain pictures.
- Do a practice read out loud first. Some sentences that look fine are impossible to say.
- Keep each shot or slide on one step, matching what the voice is saying.
If you are generating the video with an AI tool, give it the outline from Step 3 and say who the viewer is and what they should be able to do at the end. Our round-up of AI training video generators covers what to check before you choose one.
Step 6: Review with the subject expert
Every training video needs one review by the person who owns the procedure: the front desk supervisor, the warehouse lead, the compliance officer. Ask them three specific questions:
- Is every step correct and in the right order?
- Is anything missing that a new starter would get wrong?
- Does anything here contradict what we tell people on the floor?
Then show it to one person who does not know the procedure. If they cannot tell you the steps afterwards, the video is trying to do too much. Fixing it now is far cheaper than retraining people later.
Step 7: Publish where people already are
Put the video where your staff already look every day.
- Your LMS, if you have one, for anything you need to track as completed.
- Microsoft Teams or Slack, pinned in the team channel.
- WhatsApp, for frontline and shift teams away from a computer.
- A QR code at the point of work, next to the till or packing station.
Name each video by the task, not the policy number: "Handling a complaint at the front desk" beats "CS-SOP-07 v3". For new starters, order the videos by when they will need them; our guide to employee onboarding videos covers building that first-week set.

Step 8: Measure, then update
Watch counts tell you whether people opened the video. They do not tell you whether it worked. Better signals:
- Can a new starter do the task correctly on their first try?
- Did the same mistake keep happening after the video went out?
- What questions are people still asking the supervisor?
Add a short quiz if your LMS supports it. Give every video the same review date as its SOP, and when the procedure changes, change the video that week.
Worked example: handling a customer complaint at the front desk
Imagine a small hotel or clinic with this written procedure:
Front desk complaint procedure. 1. Listen to the full complaint without interrupting. 2. Acknowledge and apologise for the experience. 3. Log the complaint in the guest system with category and time. 4. Take ownership: state what you can do now, what you need to check, and when the customer will hear back. 5. Offer realistic options within your authority. 6. Escalate to the duty manager if the issue is outside your authority or the customer asks. 7. Close the loop and record the outcome.
Learning goal: after watching, a front desk team member can handle a complaint calmly, log it, and tell the customer exactly what happens next.
Format: a two-minute drawn explainer, because this is about sequence and judgement, not a physical movement. Wide for the training laptop, square for the staff WhatsApp group.
Outline you can copy:
- Open with the moment. A guest walks up, clearly annoyed. What you do in the next two minutes decides whether they leave calmer or angrier.
- Listen first. Let them finish. Do not explain or defend yet. Nod, and note the key facts.
- Acknowledge and apologise. "I'm sorry this happened. Let me sort it out." Apologise for the experience, even before you know whose fault it was.
- Log it while you talk. Category, time, and the guest's own words. A complaint that is not logged did not happen, as far as the next shift knows.
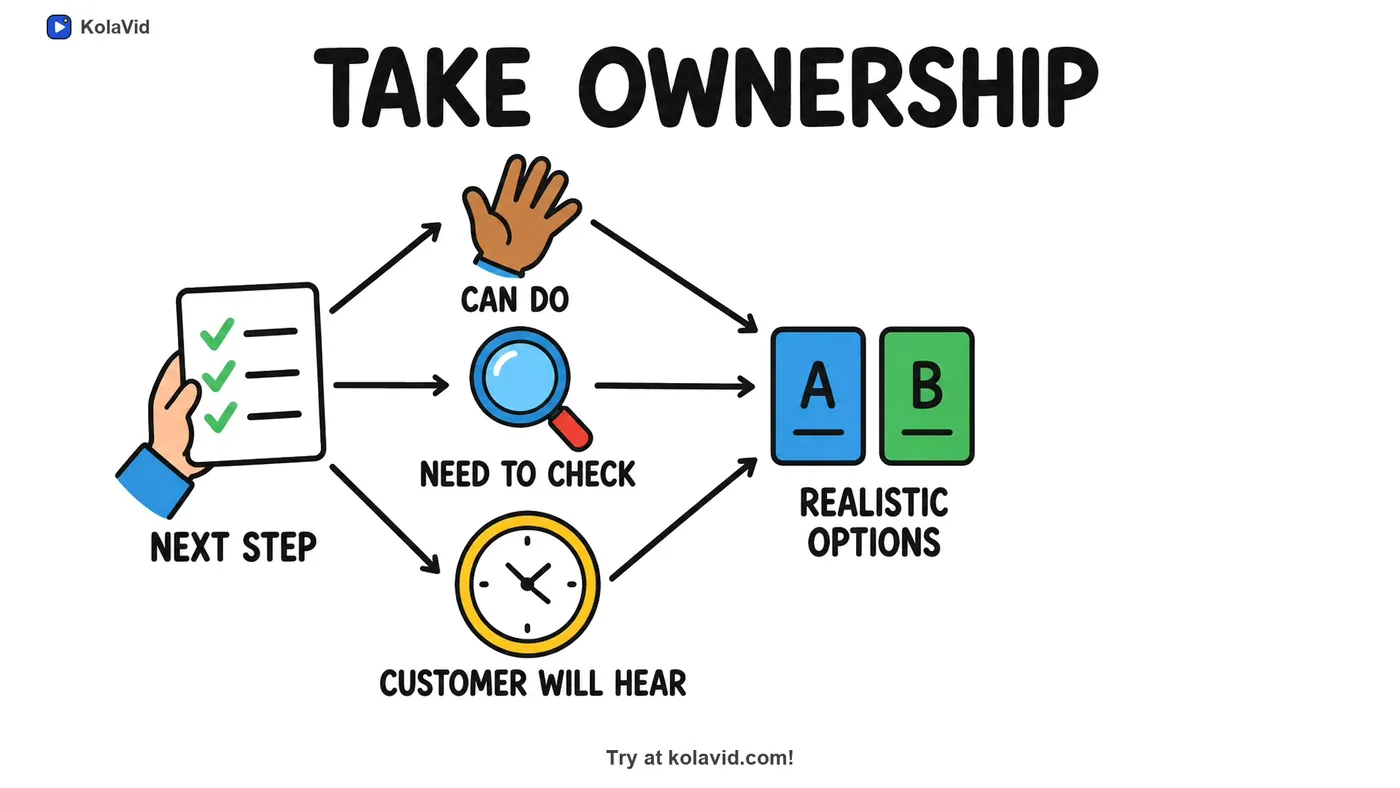
- Take ownership. Tell them what you can do now, what you need to check, and when they will hear back. Then offer realistic options.
- Know when to escalate. If it is outside your authority, or the guest asks for a manager, call the duty manager. Escalating is not failing.
- The common mistake. Promising something you cannot deliver to end the conversation. It turns one complaint into two.
- Recap. Listen, apologise, log, own the next step, escalate when needed.
Notice what it leaves out: the complaint categories, refund limits and data rules. They belong in the written policy, or in their own video.
Making a training video in KolaVid
If you would rather not record your voice or build slides, KolaVid turns a prompt, pasted text or script, a document (PDF, Word, PowerPoint or text file) or a web link into a narrated whiteboard video. Each drawing appears as the narrator says it, with one idea on each board.
For the example above, you would paste the outline into the box and add a line about the viewer: "Training video for new front desk staff. Keep it practical and calm in tone. End with a one-line recap." You can also attach the SOP itself with Add a document, then choose the frame: Wide 16:9 for the LMS, Tall 9:16 for phones, or Square 1:1 for WhatsApp.
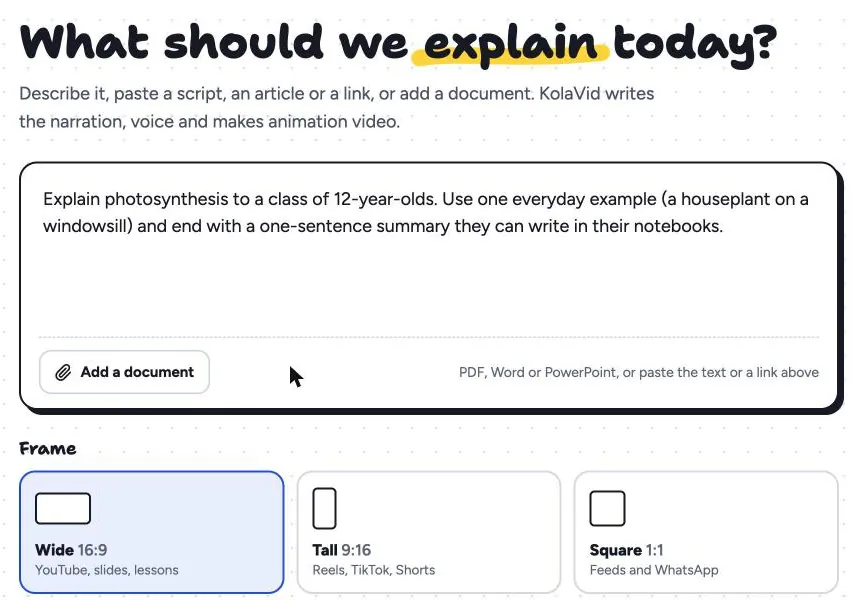
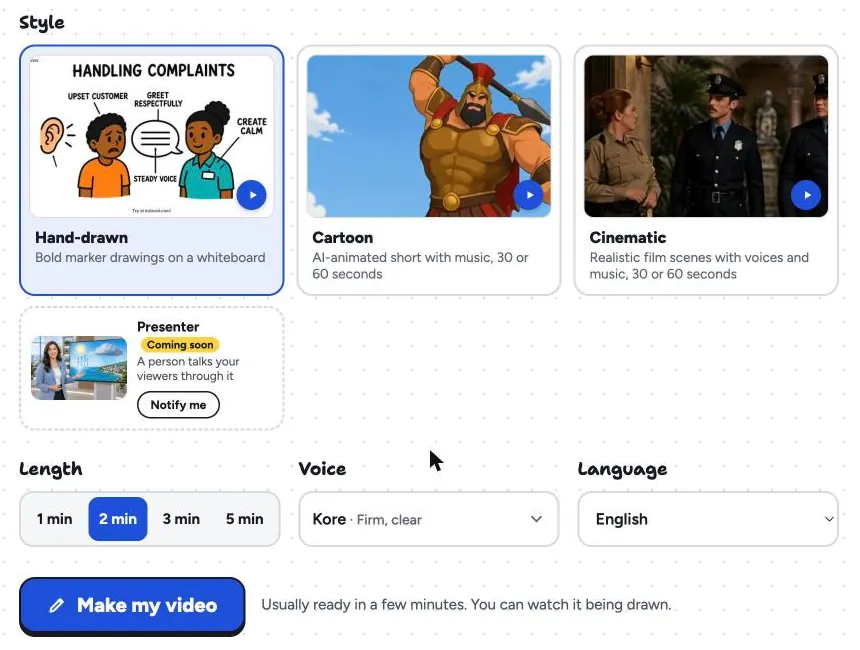
Next, pick the Hand-drawn style, the length, a voice and the narration language. Free videos run up to 2 minutes; paid plans go up to 5. The video is usually ready in a few minutes.
Here is a frame from a sample video made from a complaint-handling procedure like the one above. The "Take ownership" step became one board: the next step, what you can do, what you need to check, when the customer will hear back, and realistic options.
When it is ready, download the MP4 for your LMS, Teams channel or WhatsApp group, or share a link. One honest limit: there is no editing timeline inside the video, so you change the script and make it again. For an LMS, paid plans also export a SCORM package or an embed code. The training page has more sample videos, and the documents page shows how uploaded files are handled.
FAQ
How long should a training video be?
For a single procedure, two to three minutes is a good target. If your script runs past five minutes, it usually covers more than one procedure and should be split. Short videos are easier to find, rewatch and keep up to date.
Do I need professional equipment to make training videos for employees?
No. A recent phone, a quiet room and good light are enough for internal training. Screen recordings, slides and drawn explainers need no camera at all.
How often should training videos be updated?
Whenever the procedure changes, and at least at the same review date as the written SOP. An out-of-date training video is worse than none, because people trust what they were shown.
Start with one procedure
Pick the procedure people get wrong most often, write the one-sentence goal, and make a two-minute video this week. If you want to try it without recording anything, a free KolaVid account includes enough credits for one 2-minute video, no card needed. Paste your outline, choose your frame, and see whether your team understands the steps better than they did from the PDF.