Google Slides to Video: 4 Ways to Convert a Deck
How to convert Google Slides to video: Convert to Video in Google Vids, recording yourself, exporting through PowerPoint, or an AI tool that reads the file.
The File > Download menu in Google Slides gives you a PowerPoint file, a PDF and a few image and text formats, but not an MP4. To convert Google Slides to video you have four routes: Google's own Convert to Video feature (through Google Vids, on eligible Workspace accounts), recording yourself presenting, downloading as PowerPoint and exporting a video from there, or giving the downloaded file to an AI tool that builds a video from it.
Which one you can use depends partly on your Google account, so that comes first. Google's options below come from its help pages. Google changes these features often, so if a menu item is missing, search Google's Docs Editors Help for its name.
Which route fits you
| Your situation | Best route |
|---|---|
| Work or school Google Workspace account with Google Vids | Route 1: Convert to Video |
| You want your own voice and your slides exactly as they are | Route 2: record yourself |
| You have PowerPoint and want a plain MP4 of the deck | Route 3: download as .pptx, export from PowerPoint |
| The deck only makes sense with you explaining it | Route 4: an AI tool that reads the file |
Route 1: Convert to Video with Google Vids
Google Vids is Google's video editor inside Workspace. It can turn a Slides presentation into a video project, with each slide becoming a scene.
To start from Slides, open the presentation and choose File > Convert to Video. You can also start inside Vids and choose Convert Slides, then pick the presentation from Drive. You select which slides to bring in, and Vids builds a draft.
What Google's help pages say:
- Importing needs an eligible Google Workspace subscription. The AI script, voiceover and music options need an eligible Workspace or Google AI plan.
- With the AI options on, Vids can write a script from your slide content and speaker notes and add a voiceover. You can edit the script, swap in your own speaker notes or clear it.
- Each slide becomes one scene, 5 seconds long by default (or as long as its voiceover).
- Up to 45 slides with the AI options, or up to 100 without. A video has a 10-minute limit.
- Word art and video files on your slides are not imported.
If your organisation already pays for Workspace with Vids, this is the most direct route. A personal Gmail account may not see the option at all.
Route 2: Record yourself presenting
Recording keeps your slides exactly as they are and adds your voice, which suits teachers who want students to hear them.
Google Slides now has two built-in ways to record, and which one you see depends on your account:
- The newer Record option, which uses Google Vids' recorder and gives you a shareable link. Google's Workspace Updates blog announced it in August 2026 for Workspace customers and personal Google accounts, rolling out through September.
- The older Slides recording, on some work or school accounts: select Rec in the top right (Google says it is moving to View > Slides Recording), then Record new video. It works only in Chrome or Edge on a computer, needs edit access to the deck, and limits each recording to 30 minutes. Recordings are saved in a My Drive folder called "Slides recordings".
If you do not have the built-in recorder, any screen recorder works:
- Open the deck and select Slideshow so it fills the screen.
- Start the screen recorder built into your computer (Windows and macOS both have one) or a free recording tool.
- Talk through each slide, pausing before you click to the next.
- Stop, trim the start and end, and save as MP4.
Record each section as its own short video. If you stumble on slide 14, you redo three minutes, not twenty.
Route 3: Download as PowerPoint, then export a video
PowerPoint can save a presentation as an MP4, with narration you record slide by slide. So one route is to bring the deck over:
- In Google Slides, choose File > Download > Microsoft PowerPoint (.pptx).
- Open the file in PowerPoint and check it. Fonts, spacing and some animations can shift in the conversion, so look at every slide.
- Record narration if you want it, then export the video.
Our guide to converting a PowerPoint to a training video has the PowerPoint export steps for Windows and Mac, checked on Microsoft's support pages.
This route makes sense if you already have PowerPoint. If you do not, routes 2 and 4 are simpler.
Route 4: An AI tool that reads the exported file
Many class and training decks are built as prompts for a live speaker: a heading, three bullets, a picture. Exported as a video on their own, they leave viewers with nothing to follow. An AI tool that reads the file writes the explanation and builds a new video from it.
The steps are the same for most of these tools:
- Download the deck: File > Download, then Microsoft PowerPoint (.pptx) or the PDF option.
- Prefer the PowerPoint file if your speaker notes hold the real explanation. A plain PDF download carries only what is on the slides.
- Upload the file to the tool and add one line about the audience and purpose.
- Check the narration against the deck before you share it.
Expect the look to change. These tools make a new video from the content; they do not animate your slide design.
Before you convert: tidy the deck
A few edits help every route:
- Delete the slides only a live audience needs. Title, "Any questions?", "Break: 10 minutes".
- Split dense slides. One idea per slide reads better as a video scene.
- Write what you would say in the speaker notes. It becomes your recording script, or the source for an AI script.
- Check the order. In a live lesson you can jump back; a video plays straight through.
Worked example: a maths lesson deck
A maths teacher has a 15-slide Google Slides deck on the Pythagorean theorem: a title slide, the formula, three worked examples, two slides on using it to check a right angle, and practice questions. Students missed the lesson and need a video.
Plan: two short videos instead of one long one. Video 1 explains the theorem with one example. Video 2 shows how builders and carpenters use it to check a corner is square. The practice questions stay in the deck, for students to try after watching.
Route chosen: the deck is mostly formulas and diagrams with little text, so the teacher either records herself (Route 2) or downloads the .pptx and uses an AI tool (Route 4) with this instruction:
Video for 13-year-olds who missed the lesson. Explain the Pythagorean theorem with one worked example, using a 3, 4, 5 triangle. Speak plainly and end with the formula said once more as a summary.
Turning a Google Slides deck into a video with KolaVid
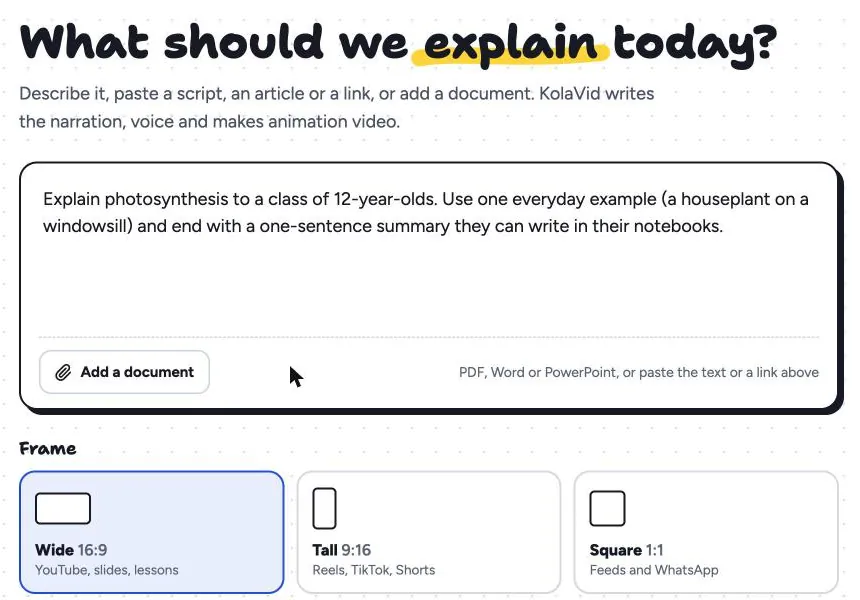
KolaVid takes the Route 4 approach. Download your deck as .pptx or PDF, then on the first screen select Add a document and attach it. Choose .pptx if your speaker notes hold the explanation: KolaVid reads the notes along with the slide text, while a PDF carries only the slides. Type the instruction about your audience in the box, choose a frame (Wide 16:9 for a class page or YouTube, Tall 9:16 for phones) and a length.
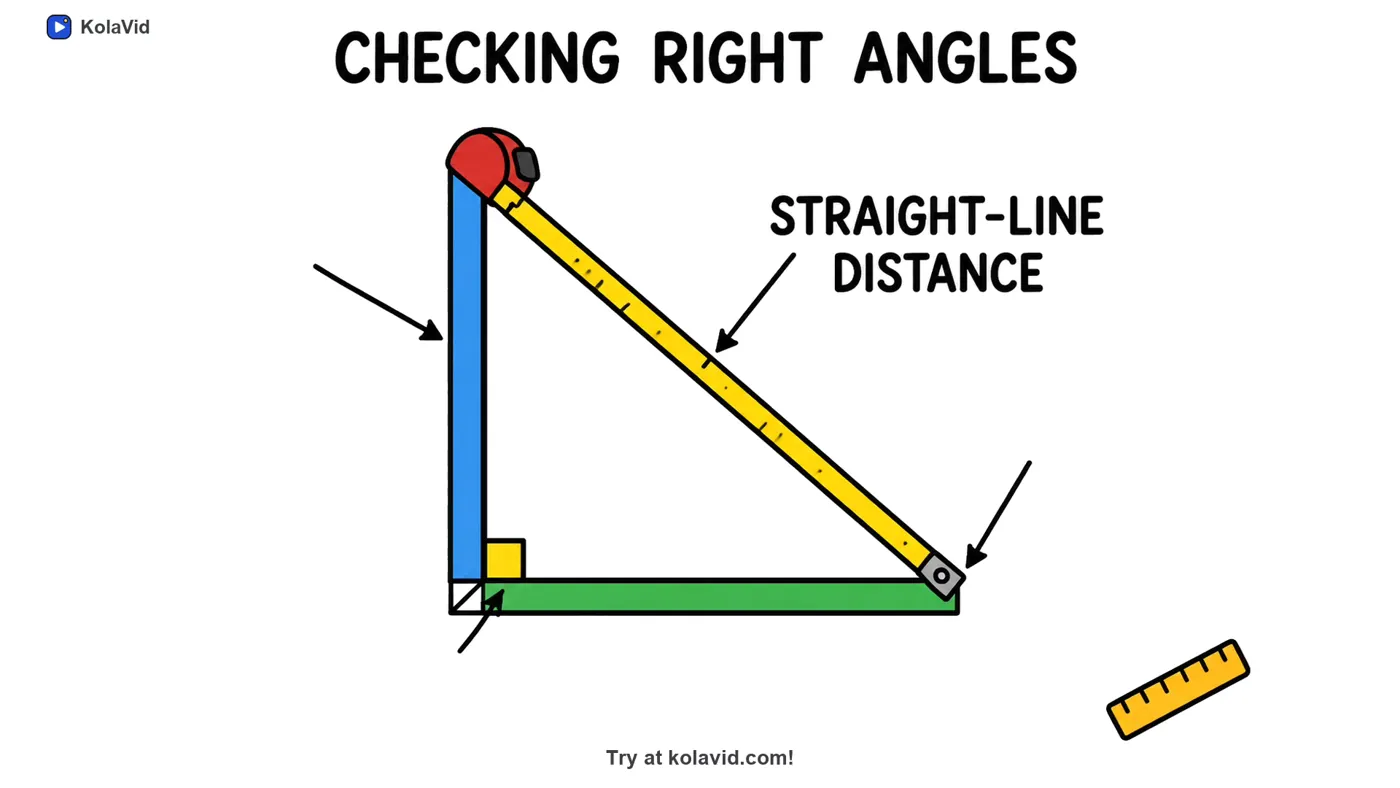
The video is a narrated whiteboard explanation: each drawing appears as the narrator says it, with one idea on each board. Here is a frame from a sample Pythagorean theorem lesson, on the board about checking right angles:
Free videos run up to 2 minutes, paid plans up to 5, and the narration can be in many languages. You download the MP4 or share a link with students. Your slide design is not kept, and there is no editing timeline, so to change something you adjust the instruction and make the video again. The page for teachers has sample lessons, and our guide to whiteboard videos for teachers covers planning a lesson video from scratch.
FAQ
Can Google Slides export directly to MP4?
Not from the Download menu, which offers PowerPoint, PDF and image and text formats. On eligible Google Workspace accounts, File > Convert to Video opens the deck in Google Vids, where it becomes a video project. Otherwise, record it or use another tool.
How do I add my voice to Google Slides?
Use one of the built-in recording options if your account has them, or record the slideshow with a screen recorder while you talk. You can also insert an audio file into each slide, but that does not turn the deck into a video file by itself.
Is there a free way to convert Google Slides to video?
Yes. Present the slideshow and record it with the screen recorder built into Windows or macOS. It costs nothing, though you will need to trim mistakes. A free KolaVid account also includes one 2-minute video, no card needed.
Will my Google Slides animations carry over?
A screen recording keeps them, because it captures what you see. Converting through PowerPoint may change some of them, and Google Vids notes that some slide content is not imported. AI tools that rebuild the video from the content do not keep your animations.
Start with the deck you use most
Pick the deck students or staff ask about most often, check which of the four routes your account allows, and turn one section into a short video first. If the deck covers a whole course, splitting it into short videos usually works better; our guide to microlearning videos shows how. The documents page explains what happens to the files you upload.