How to Make Whiteboard Explainer Videos for YouTube
A step-by-step guide to whiteboard explainer videos for a YouTube teaching channel: topics, a 15-second hook, script length, Shorts and a prompt to copy.
To make a whiteboard explainer video for YouTube, pick one question people already search for, write a short script with a hook, one idea per scene, a worked example and a recap, then turn it into drawings and narration. You can draw and edit it yourself, or let an AI whiteboard tool draw each picture as the narrator speaks. Either way, a 2-minute video needs about 280 to 300 spoken words.
Below is each step the way I'd explain it to a friend starting a teaching channel, plus a full 2-minute example you can copy.
Why whiteboard videos suit a teaching channel
Whiteboard animation works for YouTube educational videos because it shows one thing at a time. A drawing appears, the narrator names it, and the viewer's eyes go where the voice is. No stock footage, no face on camera. It also scales: once the format works, each new video is mostly a new script.
Step 1: Pick topics people search on YouTube
The best topics are questions, not subjects. "Photosynthesis" is a subject. "Why do plants need sunlight?" is a question someone types into the search bar at 10 pm before a test.
A few honest ways to find those questions:
- YouTube's own search box. Type the start of a question in your subject ("how does a", "why do") and note what autocomplete suggests. Those suggestions come from real searches.
- Comments. Read the comments on popular videos in your niche. Confused viewers tell you exactly what wasn't explained.
- Your own students or clients. If you teach or coach, the questions you answer every week are your first ten videos.
- YouTube Studio. Once your channel has some views, the Research tab in YouTube Studio analytics (where it's available) shows what your audience searches for.
Group the questions into small series, such as "how everyday machines work", so one video leads to the next.
Step 2: Structure every video the same way
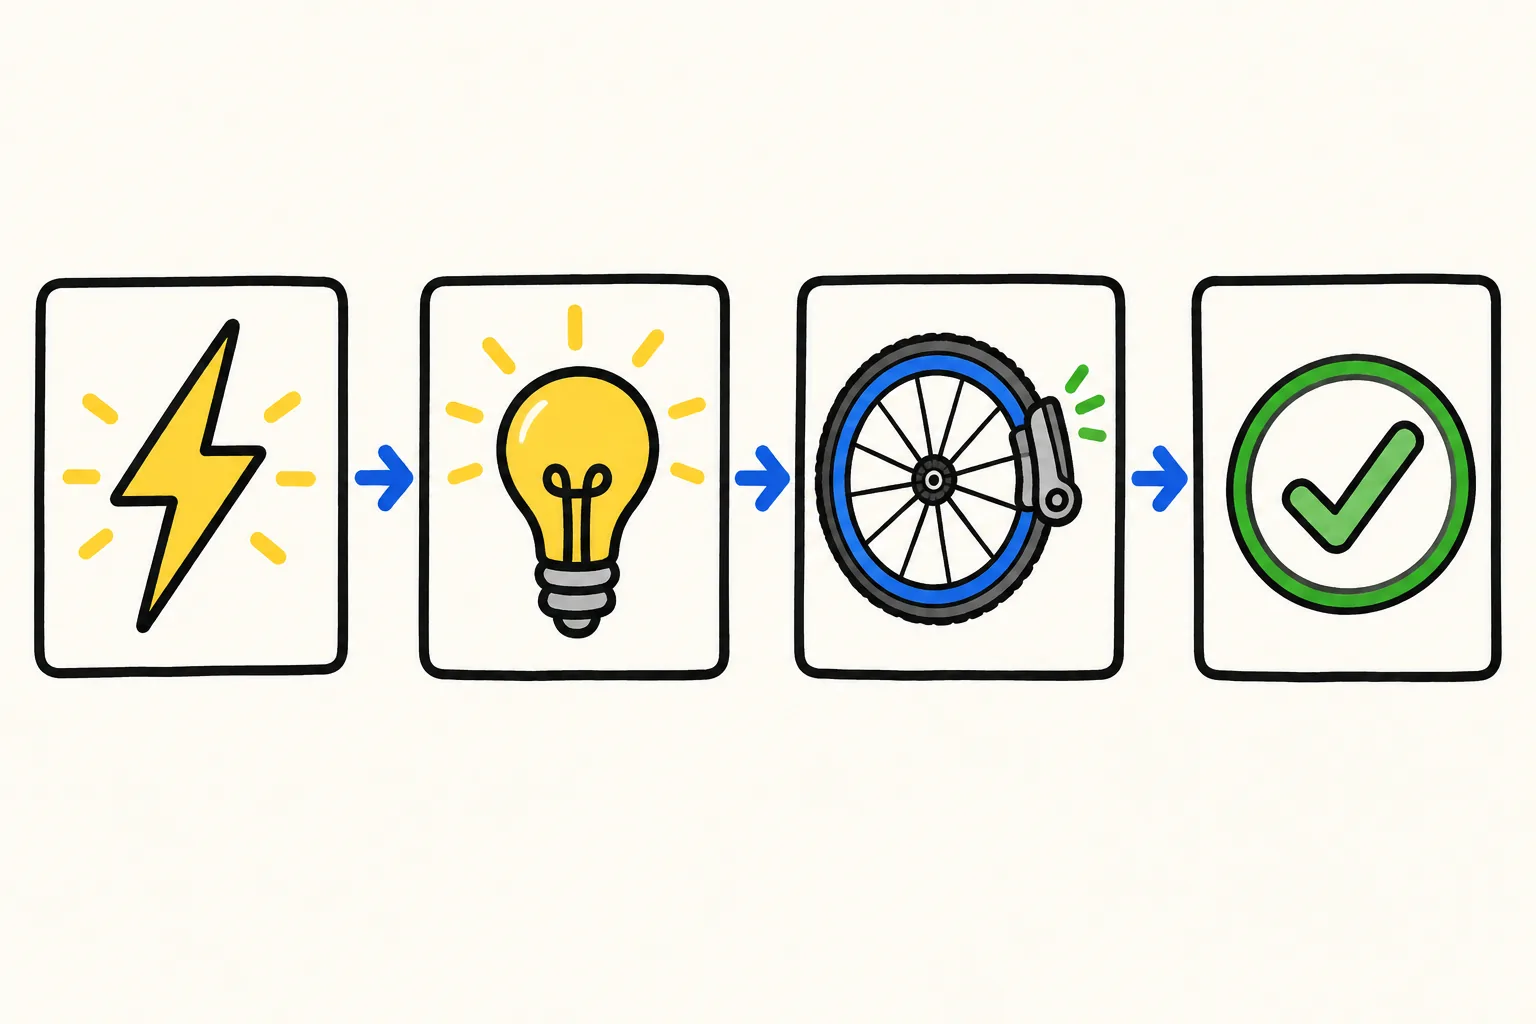
A repeatable shape saves you hours and makes your channel feel consistent. This four-part structure works for nearly any explainer:
- Hook (first 15 seconds). State the question, or show the surprising thing, right away. Skip "Hi everyone, welcome back." Viewers decide fast whether to stay, so give them the reason in the first sentence.
- One idea per scene. Each scene, or board, carries one point with one or two drawings. If you need the word "also", you probably need a new scene.
- A worked example. Take the idea and walk through one specific case. Numbers, a named object, a real situation. This is where understanding actually happens.
- Recap. One or two sentences the viewer could repeat to a friend. End there, or with a pointer to the next video in the series.
If your videos are drifting long, the guide on short vs long explainer videos helps you decide what to cut and when a topic deserves two videos.
Step 3: Match script length to video length
Narration for explainer videos usually lands at about 140 to 150 spoken words a minute. Slower than chat, faster than a lecture. Use that to size your script before you make anything:
| Video length | Spoken words (approx.) | Scenes that fit comfortably |
|---|---|---|
| 1 minute | 140-150 | 3-4 |
| 2 minutes | 280-300 | 5-7 |
| 3 minutes | 420-450 | 7-10 |
| 5 minutes | 700-750 | 12-16 |
Read your script aloud with a timer. If it runs long, cut whole sentences rather than rushing the delivery. Short sentences, around ten to twelve words, are easier to follow when there's a picture to look at too.
If you already have notes or a full script, turning a script into a whiteboard video covers how to mark it up into scenes.
Step 4: Make it, by hand or with AI
There are two broad routes to a finished whiteboard video.
The manual route. You use a whiteboard animation program with a drawing library, place each image on a timeline, record your voice, then line up every drawing with its word. You get fine control, but it takes a long time per minute of video and the timing is fiddly.
The AI route. An AI explainer video tool takes your prompt or script, writes or keeps the narration, draws the pictures and times each one to the voice. You give up some control over exact placement. In return, a video that would take an afternoon takes minutes, which makes a weekly upload schedule realistic.
Either way, the script and structure from steps 2 and 3 do most of the teaching. The tool only carries it.
Step 5: Choose a voice and language
Pick one narrator voice and keep it. A channel that sounds familiar feels like one teacher, and a clear, steady voice beats a dramatic one.
If you speak a second language, a playlist or channel in that language can reach viewers with fewer good explainers to choose from. Write the script natively rather than translating it line by line.
Step 6: Use 16:9 for the channel and 9:16 for Shorts
Make your main videos landscape 16:9: it fills the player on laptops and TVs and gives drawings room. Then reuse the topic for a Short, written as a new, tighter vertical 9:16 version:
- Take just the hook and the single most surprising point.
- Aim for 30 to 60 seconds, about 70 to 150 words.
- End with a line that points to the full video.
The long video answers the search; the Short reaches people who never searched.
Step 7: Title, description, chapters and thumbnail
Title. Put the question or the searched phrase first: "How Bicycle Brakes Work (Rim vs Disc, Explained Simply)". Keep the important words early, because long titles get cut off in search results and on phones.
Description. The first lines show under the video, so make them a plain summary of what the viewer will learn. Below that, add links to related videos and your chapters.
Chapters. Add timestamps in the description, starting at 0:00. YouTube needs at least three timestamps, each at least 10 seconds long, to show chapters. Your scene structure makes this easy: each part of the video is already a chapter.
Thumbnail. Use one big drawing from the video plus three or four words at most, in high contrast. A whiteboard frame on its own often looks too pale at thumbnail size, so add a coloured background or a bold outline. YouTube recommends 1280 x 720 pixels.
Captions. Add captions in YouTube Studio. YouTube can generate them automatically for many languages; check and correct them, especially technical terms.
Step 8: Set a publishing rhythm you can keep
Consistency beats volume. One good explainer a week, with one or two Shorts from the same topic, is a pace many solo creators can sustain for months. Three a week for three weeks, then silence, is worse.
Batch the work: write four scripts in one sitting, make the videos in another, and schedule them. Put each series in a playlist. Every month, check which videos people watched to the end, and make more of those.
Worked example: a 2-minute video on bicycle brakes
Here's a complete outline you can follow or adapt. It runs about 290 words of narration.
Title: How Bicycle Brakes Work (Explained in 2 Minutes)
| Scene | What's said (summary) | Drawings | Words |
|---|---|---|---|
| 1. Hook | You squeeze a lever with two fingers and a whole bike and rider stop. How does such a small pull stop so much weight? | Hand on a brake lever, moving bicycle | 35 |
| 2. The cable | Squeezing the lever pulls a thin steel cable that runs to the brake. | Lever, cable, arrow to the wheel | 40 |
| 3. The pads | At the wheel, the cable closes two rubber pads onto the rim. | Two pads, wheel rim | 45 |
| 4. Friction | The pads rub against the turning rim. That rubbing is friction, and it fights the wheel's motion. | Pads on rim, small heat marks | 50 |
| 5. Worked example | Riding downhill, you brake gently. The pads turn your speed into heat, which is why rims can feel warm after a long descent. On a wet day, water between pad and rim cuts the friction, so you need more distance to stop. | Bike on a hill, warm rim, rain drops | 75 |
| 6. Disc brakes | Disc brakes work the same way, but the pads squeeze a metal disc at the centre of the wheel instead of the rim. | Wheel with disc at the hub | 30 |
| 7. Recap | Lever pulls cable, cable closes pads, pads make friction, friction turns motion into heat. That's a complete stop. | The four steps in a row, stopped bike | 20 |
Each scene has one job, and the worked example is the longest part. That's deliberate.
A prompt you can paste into an AI whiteboard tool, or use as a brief for yourself:
Make a 2-minute whiteboard explainer for a YouTube channel that explains how everyday machines work. Topic: how bicycle brakes work. Audience: curious adults and teenagers with no physics background. Open with the question of how a two-finger squeeze can stop a bike and rider. Then explain, one idea per scene: the lever pulls a cable, the cable closes two pads on the rim, the pads create friction, and friction turns motion into heat. Use one worked example: braking down a long hill, and why wet rims need more stopping distance. Briefly show that disc brakes squeeze a disc at the hub instead. End with a one-sentence recap: lever, cable, pads, friction, heat.
For more on writing prompts that come out well, see prompt writing for whiteboard videos.
Making it with KolaVid
KolaVid is an AI whiteboard video maker built for exactly this kind of video. Here's how the bicycle example goes from prompt to file.
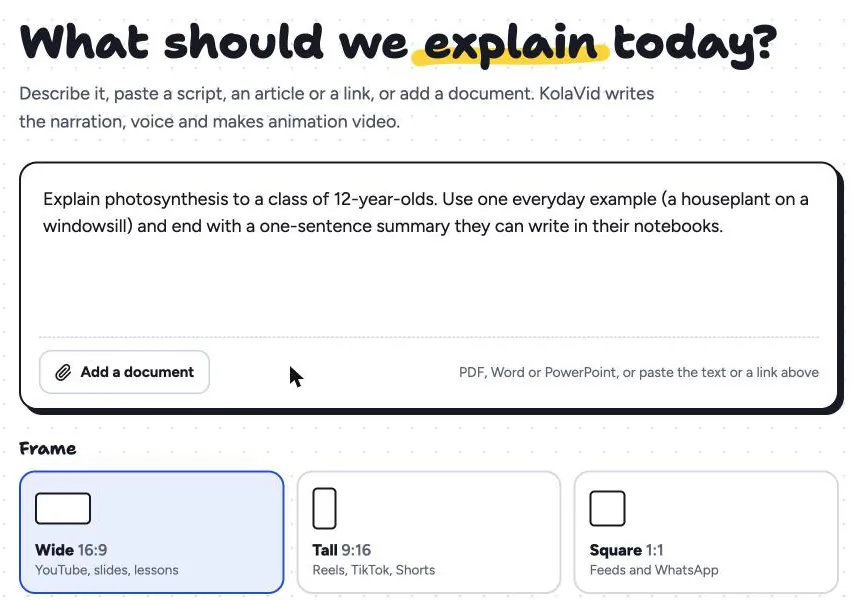
First, paste your prompt or script into the composer. You can also add a PDF, Word or PowerPoint file, or paste a link. Under Frame, choose Wide 16:9 for your channel video, or Tall 9:16 when you make the Short.
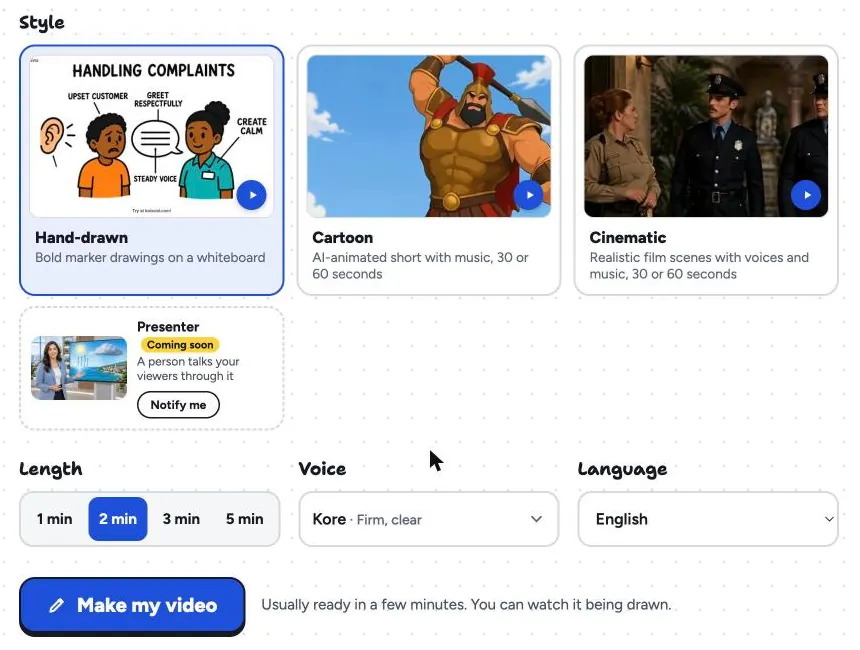
Next, choose the Hand-drawn style, the length, a voice and the narration language, then press Make my video. Videos are usually ready in a few minutes.
KolaVid writes the narration from your prompt, or narrates the script you pasted. Each drawing appears as the narrator says it, one idea a board.
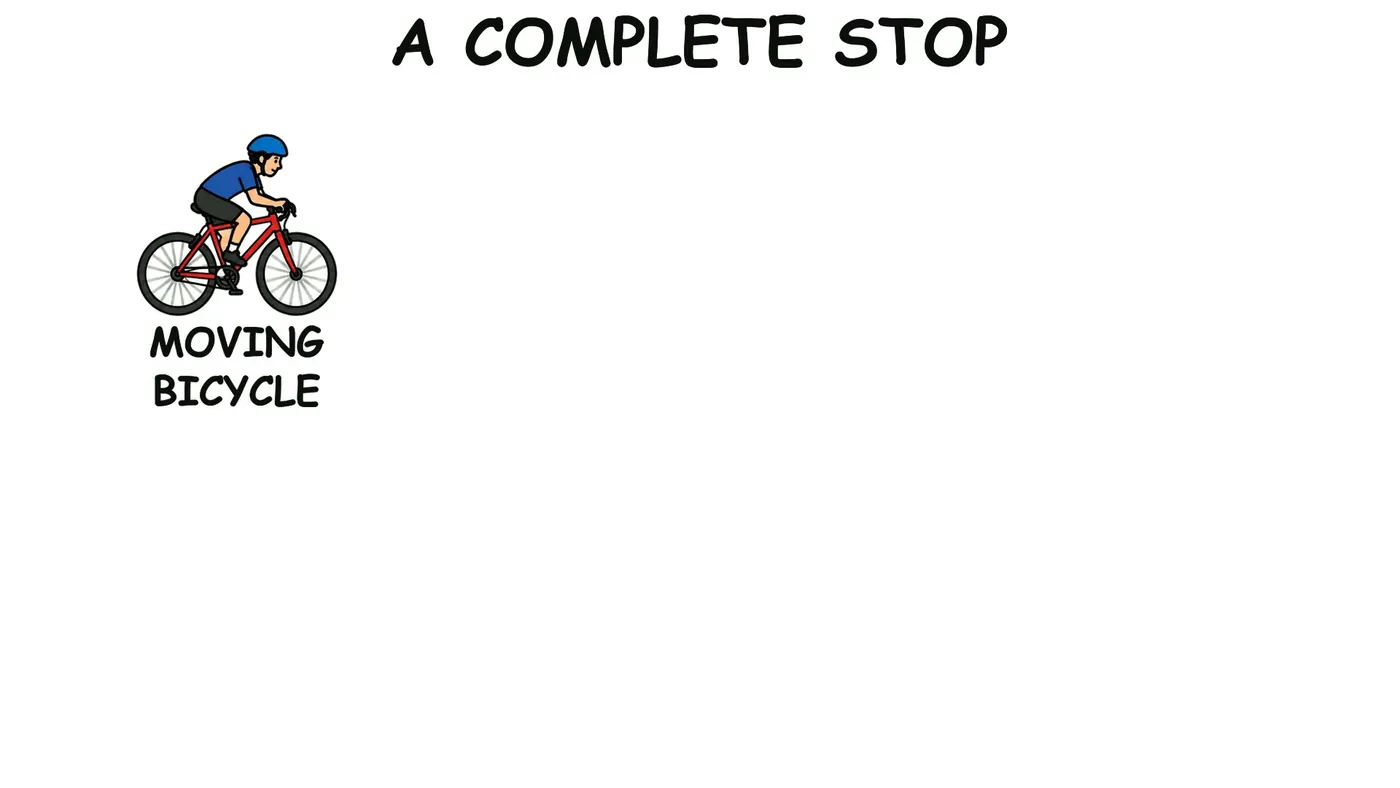
When it's done, download the MP4 and upload it to YouTube. Two practical notes: whiteboard videos come with captions, so download the .srt file and upload it in YouTube Studio (check it there), and there's no editing timeline, so if you want changes, adjust the prompt or script and make it again.
A free account includes 120 credits, enough for one 2-minute video, with no card needed. Free videos run up to 2 minutes; paid plans go up to 5 minutes. The whiteboard video page shows sample videos and the full feature list.
FAQ
Can I monetise AI-made videos on YouTube?
Possibly, but nobody can promise it. YouTube decides eligibility for its Partner Program, and its policies favour original content that gives viewers real value, not mass-produced or repetitive uploads. Videos with your own topic choices, your own scripts and a clear teaching purpose are on firmer ground than near-identical videos churned out in bulk. Read YouTube's current monetisation and disclosure policies yourself; as the creator, you're responsible for following them.
Do I need drawing skills to make whiteboard animation videos?
No. Manual tools come with drawing libraries, and AI tools draw the pictures for you. What you do need is a clear script. A plain script with good examples will beat beautiful drawings over a muddled explanation.
How long should a YouTube educational video be?
As long as the question needs, and no longer. Many single-question explainers work well at 2 to 5 minutes. Use the 140 to 150 words-a-minute rule to check your script, and split a topic into a series if it keeps growing.
Can one script become both a long video and a Short?
Yes, but write the Short as its own tight script rather than trimming the long one. Keep the hook and one strong point, make it vertical, and link the full video from the Short.
Start with one question
Pick one question from your list, write the 290-word script, and make the video this week. Then do it again next week. If you'd like the drawing, narration and timing handled for you, you can try it free on KolaVid for teachers or go straight to the whiteboard maker and paste the bicycle prompt above.