How to Make an Educational Video: A 6-Step Guide
How to make an educational video students learn from: set the objective, keep one idea, pick an example, structure, make and check it. Three subject examples.
An educational video works when it teaches one thing well. To make one, write down what students should be able to do afterwards, cut the topic down to a single idea, choose one example that carries that idea, put it in a simple order, make the video, and check it with a student before you share it.
None of those steps needs editing skills or a camera. Below, each step in turn, then three complete examples from science, history and English that you can adapt.
What makes educational videos for students work
Educational videos that students skip usually cover a whole unit, talk in general terms and end without saying what to remember. The ones they rewatch are short, concrete and finish with a clear takeaway. Keep three tests in mind:
- Can a student say what it was about in one sentence? If not, it covers too much.
- Is there a real example? A named object, a real date, an actual sentence. Students remember the example and rebuild the rule from it.
- Does it end with something to write down? A recap of one to three sentences.
Step 1: Write the objective as something students can do
Start with the sentence "After watching, students can..." and finish it with a verb you could check in class the next day.
- "...explain why a bike slows down when you pull the brake lever."
- "...give three reasons the Great Fire of London spread so far."
- "...find the topic sentence in a paragraph and write one of their own."
"Understand friction" is a topic, not an objective. You cannot see understanding, so you cannot tell whether the video worked. An action gives you the test, and tells you what to leave out.
Step 2: Cut the topic down to one idea
This is the step that decides whether the video is watchable. A lesson on forces might include friction, gravity, air resistance and balanced forces. That is four videos, not one.
A simple way to check: write the main idea as a single sentence of no more than about fifteen words. For the brakes example, that sentence is "Brakes slow a wheel by rubbing against it, and that rubbing is called friction." Everything in the video should serve that sentence. Interesting extras go into the lesson, the worksheet or a second video.
Step 3: Choose one example that carries the idea
An explanation with no example is hard to follow, and one with five is hard to remember. Pick one from your students' lives: something they have seen or done, that can be pictured, and that shows the idea working, not just next to it. A bicycle brake shows friction working. A list of "places friction happens" does not.
If you teach younger students, the example can be the whole explanation. With older students, start with the example and then name the general rule it shows.
Step 4: Put it in a simple structure
For a single-idea video of one to three minutes, this order works for almost any subject:
- Hook: a question or situation students recognise (one or two sentences).
- The idea: said plainly, in one sentence.
- The example, step by step: the bulk of the video.
- The common mistake or misconception: what students often get wrong, and why.
- Recap: the one to three sentences to write down.
Write it as speech, not as notes. Read it aloud once. People speak at roughly 130 to 150 words a minute, so a two-minute video is about 250 to 300 words. Our article on short versus long explainer videos goes further into choosing the length.
Step 5: Make the video
There are three common ways, and the right one depends on what the idea needs to show.
| Method | Suits | Effort |
|---|---|---|
| Recording yourself at a board or desk | Demonstrations, experiments, handwriting | A quiet room, good light, a phone on a stand |
| Slides with your voice over them | Topics with a few key images or quotes | Easy to make, but easy to overload with text |
| A drawn explainer (by hand or with an AI tool) | Processes, causes, how-it-works topics | Little or none, once the outline is written |
Whatever you choose, match the picture to the voice: when you say "the brake pads", the brake pads should be on screen.
Step 6: Check it before students see it
Watch it as if you were the student, then run three checks:
- Accuracy. Every fact, date, number and spelling. An error in a video is repeated every time it is played.
- Language. Words your students know, terms you will use in class, names pronounced the way you say them.
- One student. Show it to one student, or a colleague's child of the right age, and ask them to tell you the idea back. If they cannot, the video is still trying to do too much.
Then decide when students will watch it, and add one or two questions so they watch with a purpose.
Three examples you can adapt
Each example below shows the objective, the idea sentence, the outline and a prompt you can use with an AI video tool or as your own recording script.
Science: why a bike stops (ages 11 to 12)
Objective: students can explain why a bike slows down when you pull the brake lever.
Idea: brakes slow a wheel by rubbing against it, and that rubbing force is called friction.
Outline:
- Hook: you are riding downhill and a dog runs out. What actually happens when you squeeze the lever?
- The lever pulls a cable, and the cable squeezes two rubber brake pads against the wheel's rim.
- Where the pads rub the rim, friction pushes against the turning of the wheel.
- The wheel's movement energy becomes heat. Touch a rim after a long downhill and it feels warm.
- Common mistake: thinking the brake "stops" the wheel instantly. It slows it, which is why wet rims, with less friction, take longer to stop.
- Recap: brake pads rub the rim, friction slows the wheel, and movement turns into heat.
Prompt:
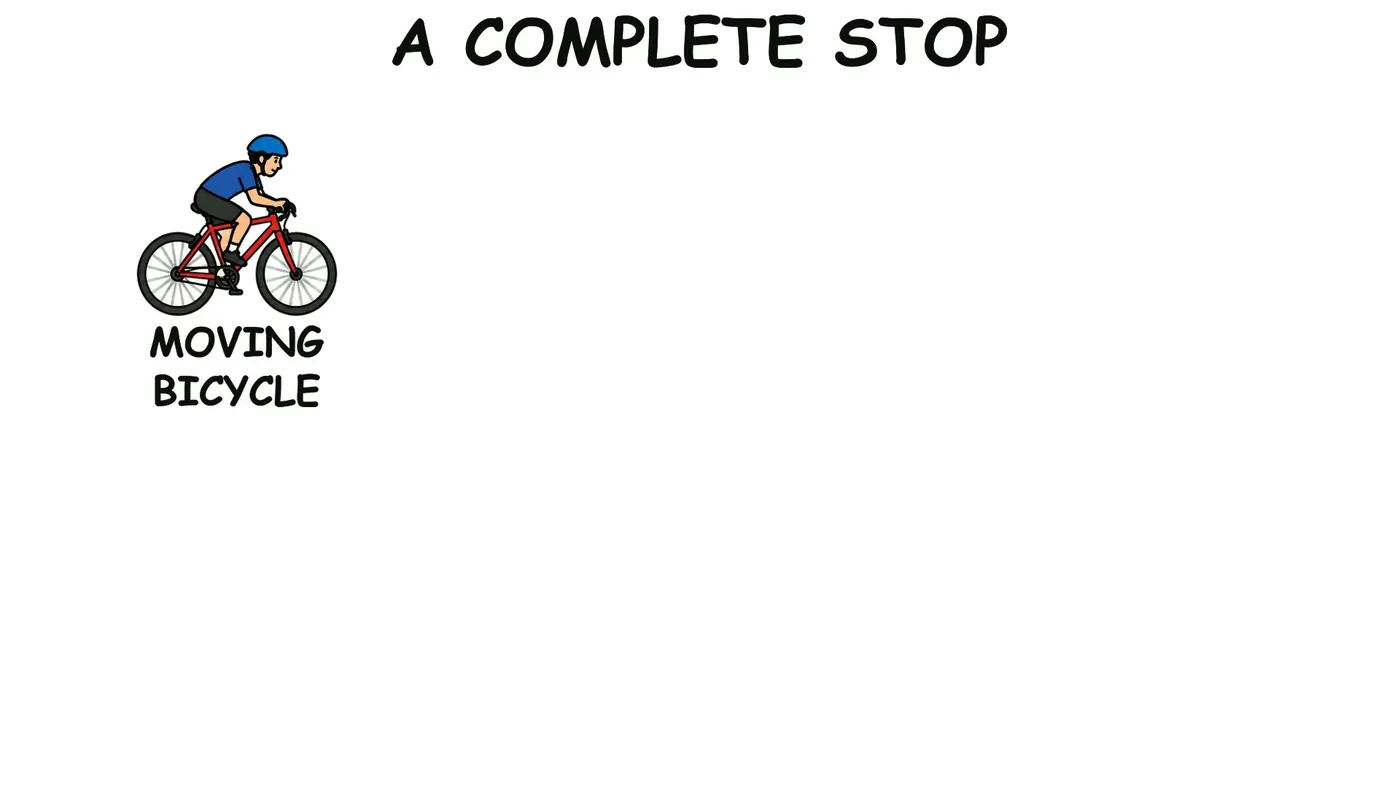
Explain to 11 and 12 year olds why a bike slows down when you pull the brake lever. Follow one example: the lever pulls a cable, the cable squeezes the brake pads onto the rim, and friction slows the wheel while movement turns into heat. Mention that wet rims take longer to stop. End with a three-part recap. 2 minutes.
History: why the Great Fire of London spread (ages 11 to 13)
Objective: students can give three reasons the fire spread so far.
Idea: a small fire became a huge one because of how the city was built, the weather, and slow decisions.
Outline:
- Hook: early on Sunday 2 September 1666, a fire starts in a bakery on Pudding Lane. Why did it not stay there?
- Reason one, the buildings: houses were mostly wood, packed tightly, with upper floors leaning close across narrow streets.
- Reason two, the weather: a long dry summer had dried the timber, and a strong east wind pushed the flames west.
- Reason three, slow decisions: pulling down houses to make firebreaks was the main defence, and it was not done quickly enough at the start.
- Common mistake: listing causes without saying how each one made the fire spread. Each reason needs a "so...".
- Recap: wooden houses close together, dry weather and wind, and slow action.
Prompt:
Explain to 12 year olds why the Great Fire of London in 1666 spread so far. Start at the bakery on Pudding Lane. Give three reasons, one at a time: wooden houses built close together, a dry summer with a strong east wind, and firebreaks made too slowly. Show how each reason helped the fire spread. End with a one-line recap of each reason. 3 minutes.
English: writing a topic sentence (ages 12 to 14)
Objective: students can find the topic sentence in a paragraph and write one.
Idea: a topic sentence tells the reader what the whole paragraph is about, and the other sentences back it up.
Outline:
- Hook: you open a long paragraph and have no idea where it is going. A topic sentence fixes that.
- The idea: usually the first sentence, it states the paragraph's main point.
- Example: "School uniforms save families time in the morning." Then three supporting sentences: no choosing outfits, fewer arguments, clothes ready the night before.
- Common mistake: a topic sentence that is just the subject, like "This paragraph is about uniforms." It names a topic but makes no point.
- Recap: one sentence, one point, and the rest of the paragraph supports it.
Prompt:
Teach 13 year olds what a topic sentence is. Use one example paragraph about school uniforms saving families time in the morning, with three supporting sentences. Show the difference between a real topic sentence and a weak one like "This paragraph is about uniforms." End with a two-sentence recap. 2 minutes.
All three prompts name the age, one example, the common mistake and the ending. Those details matter more than any instruction about style. Our guide to writing prompts for whiteboard videos has more on this.
Making the video in KolaVid
KolaVid turns a typed prompt, your pasted lesson text, or an uploaded PDF, Word or PowerPoint file into a narrated whiteboard video. Each drawing appears as the narrator says it, with one idea on each board.
Paste one of the prompts into the box, or click Add a document to use notes you already have, then choose the frame: Wide 16:9 for the classroom screen, Tall 9:16 for phones, or Square 1:1 for a class WhatsApp group.
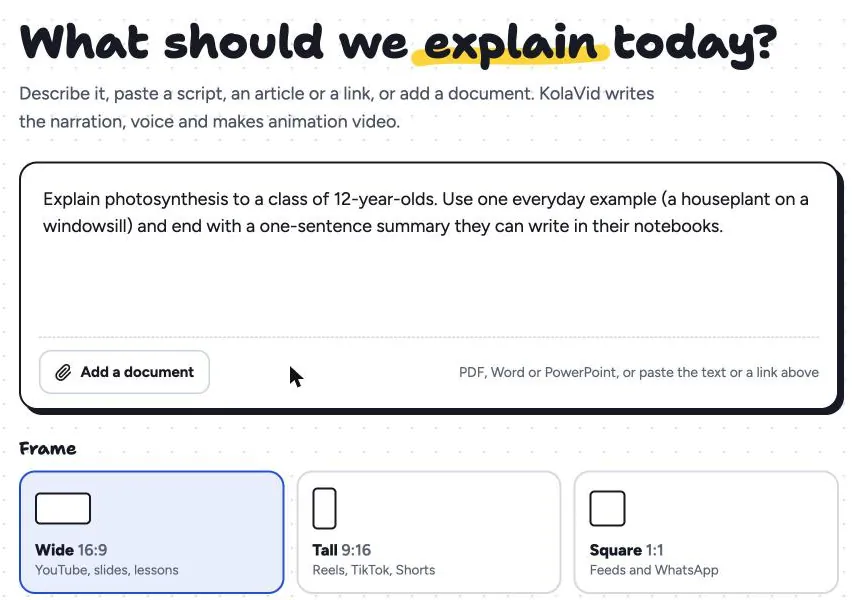
Choose a length of 1, 2, 3 or 5 minutes (free videos go up to 2 minutes), a female or male voice and the narration language. It is usually ready in a few minutes, and you can watch it being drawn. Then download the MP4 or share a link. If something is wrong, you change the prompt and make it again, since there is no editing timeline. The teachers page shows sample lesson videos, and if your starting point is a set of notes, see turning notes into an explainer video.
FAQ
How long should an educational video be?
For one idea, one to three minutes is a good range. Longer videos work for a full explanation students watch at home with time to pause, but if a script passes five minutes it usually holds more than one idea and is better split.
Do I need to appear on camera?
No. Many effective lesson videos never show the teacher. A clear voice and pictures that match what is being said matter more than a face, and drawn or slide-based videos need no camera at all.
How do I know students actually learned from it?
Ask one or two questions about the idea at the start of the next lesson, or in a short form after the video. The objective from Step 1 gives you the question.
Start with tomorrow's lesson
Pick the idea students found hardest last time, write the one-sentence objective, and make a two-minute version. A free KolaVid account includes one 2-minute video, no card needed, so you can test the method on a real lesson.